What are KSeF certificates for?
KSeF certificates let bFAST connect to the National e-Invoicing System (KSeF) on behalf of your company. With them, the software can send invoices to KSeF and download documents from the system.
You generate the certificates yourself on the KSeF platform, then add them in your bFAST client panel. This guide walks you through the whole process step by step.
Watch the video guide
If you'd rather see the whole process on screen, we've prepared a video tutorial. It shows how to log in to KSeF, generate the certificates, and add them to bFAST.
Below, you'll also find written instructions to follow while you set everything up.
Video not loading? Watch it on YouTube.
What are KSeF certificates, and which ones do you need?
You need two KSeF certificates for the setup.
Each one consists of:
- ●a private key file (.key)
- ●a certificate file (.crt)
- ●the password you set when submitting the request
You need two types of certificates:
„Uwierzytelnienie w systemie KSeF” (Authentication in the KSeF system)
This certificate lets bFAST authenticate with KSeF on behalf of your company.
„Podpis linku do weryfikacji wystawcy” (Signing the issuer verification link)
This certificate is used to support offline mode and to sign the link that allows the invoice issuer to be verified.
You generate each certificate separately. Once you're done, you'll have two .key files and two .crt files.
A certificate can be valid for up to 2 years.
Before you start
Before you begin, have the following ready:
- ●your company's NIP (tax identification number)
- ●access to KSeF
- ●permissions to manage certificates
- ●an account with access to the bFAST panel
- ●a secure place to store the certificate files
In our example, we log in to KSeF with the mObywatel app.
If the certificate permissions were granted just now, log out of KSeF and log back in.
How to generate a certificate in KSeF, step by step
Log in to KSeF
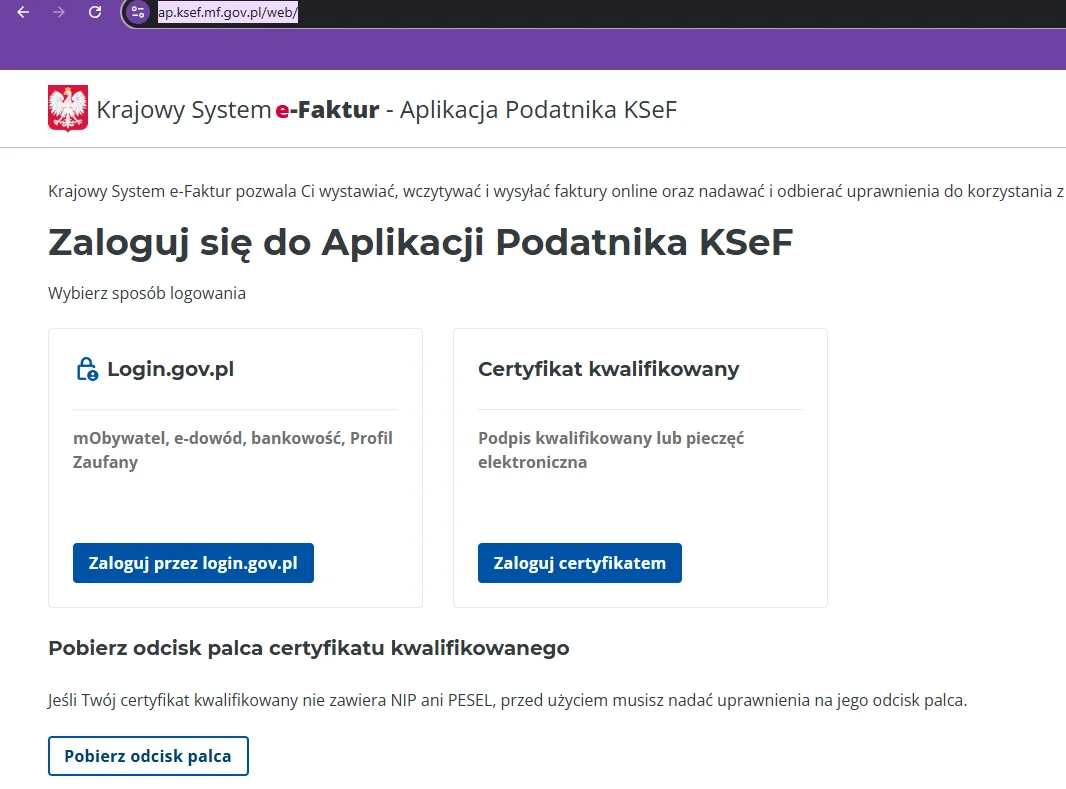
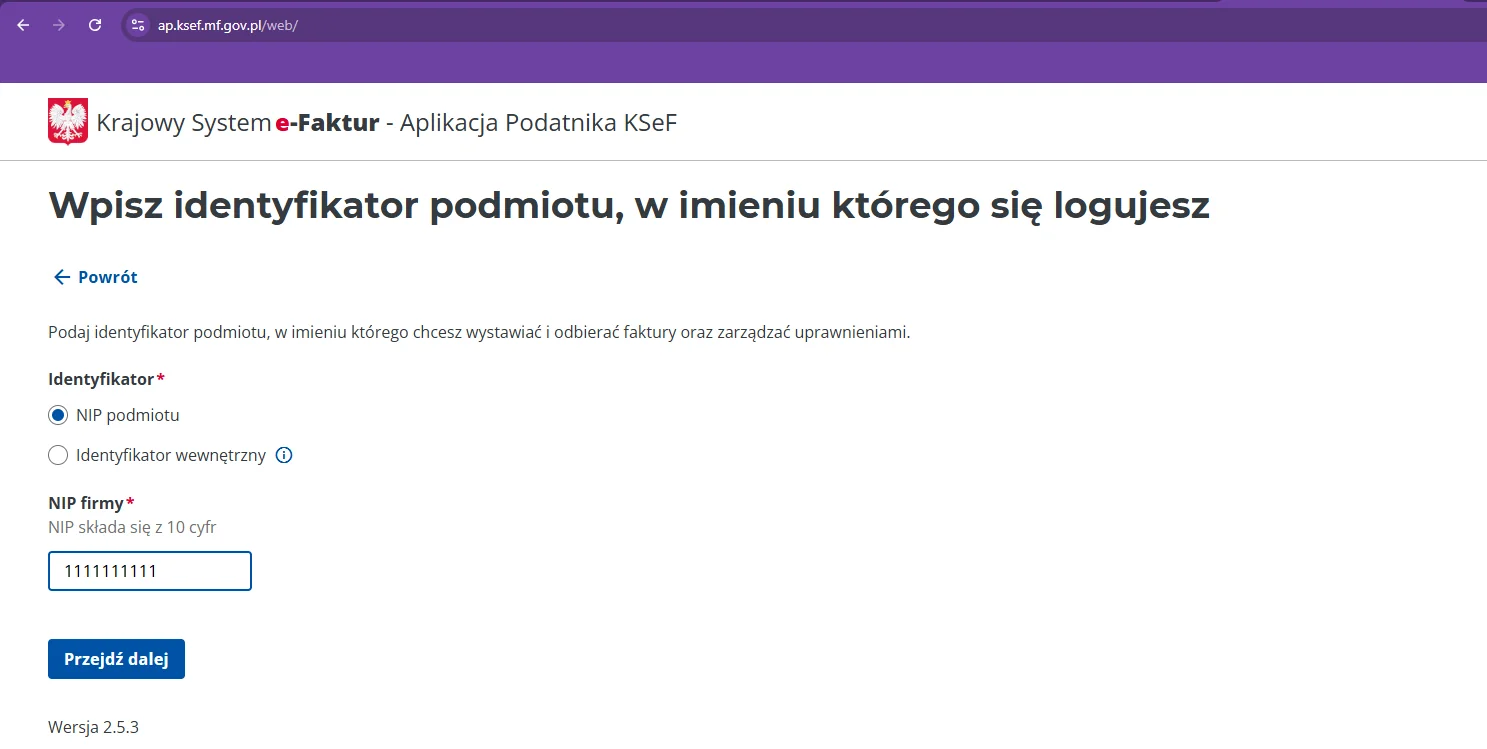
Go to the KSeF platform, click „Zaloguj się” (Log in), enter your company's NIP, and choose a login method.
In our example, we use the mObywatel app.
Go to the „Certyfikaty” (Certificates) tab
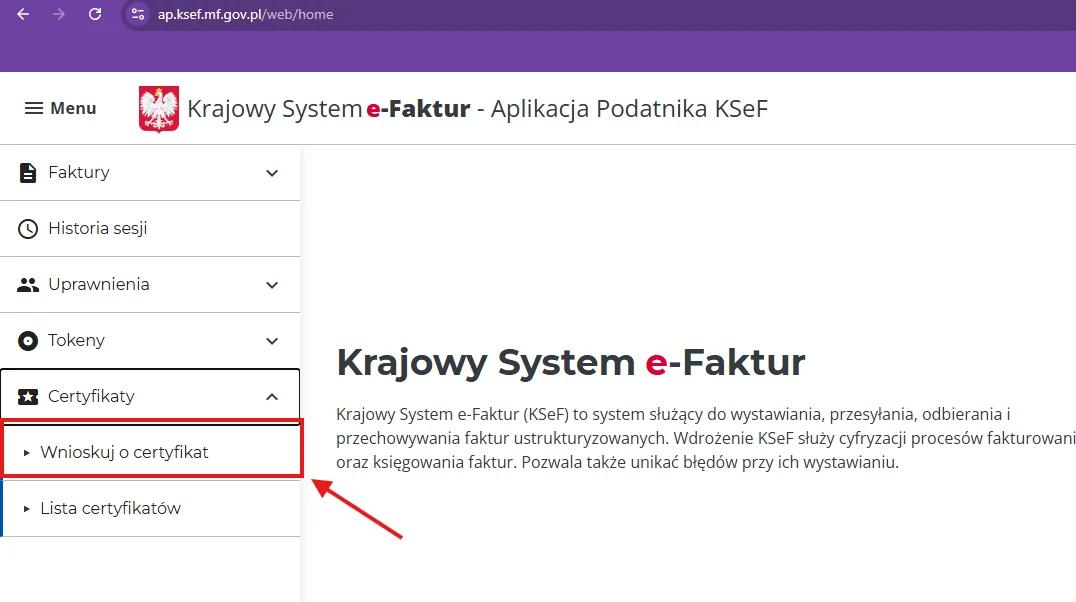
In the menu, select „Certyfikaty,” then „Wnioskuj o certyfikat” (Request a certificate).
Name the certificate and set a password
Enter a name that will help you recognize the certificate later.
Then set a password and enter it again.
You'll need the password when you add the certificate to bFAST, so store it somewhere safe.
For convenience, you can use the same password for both certificates.
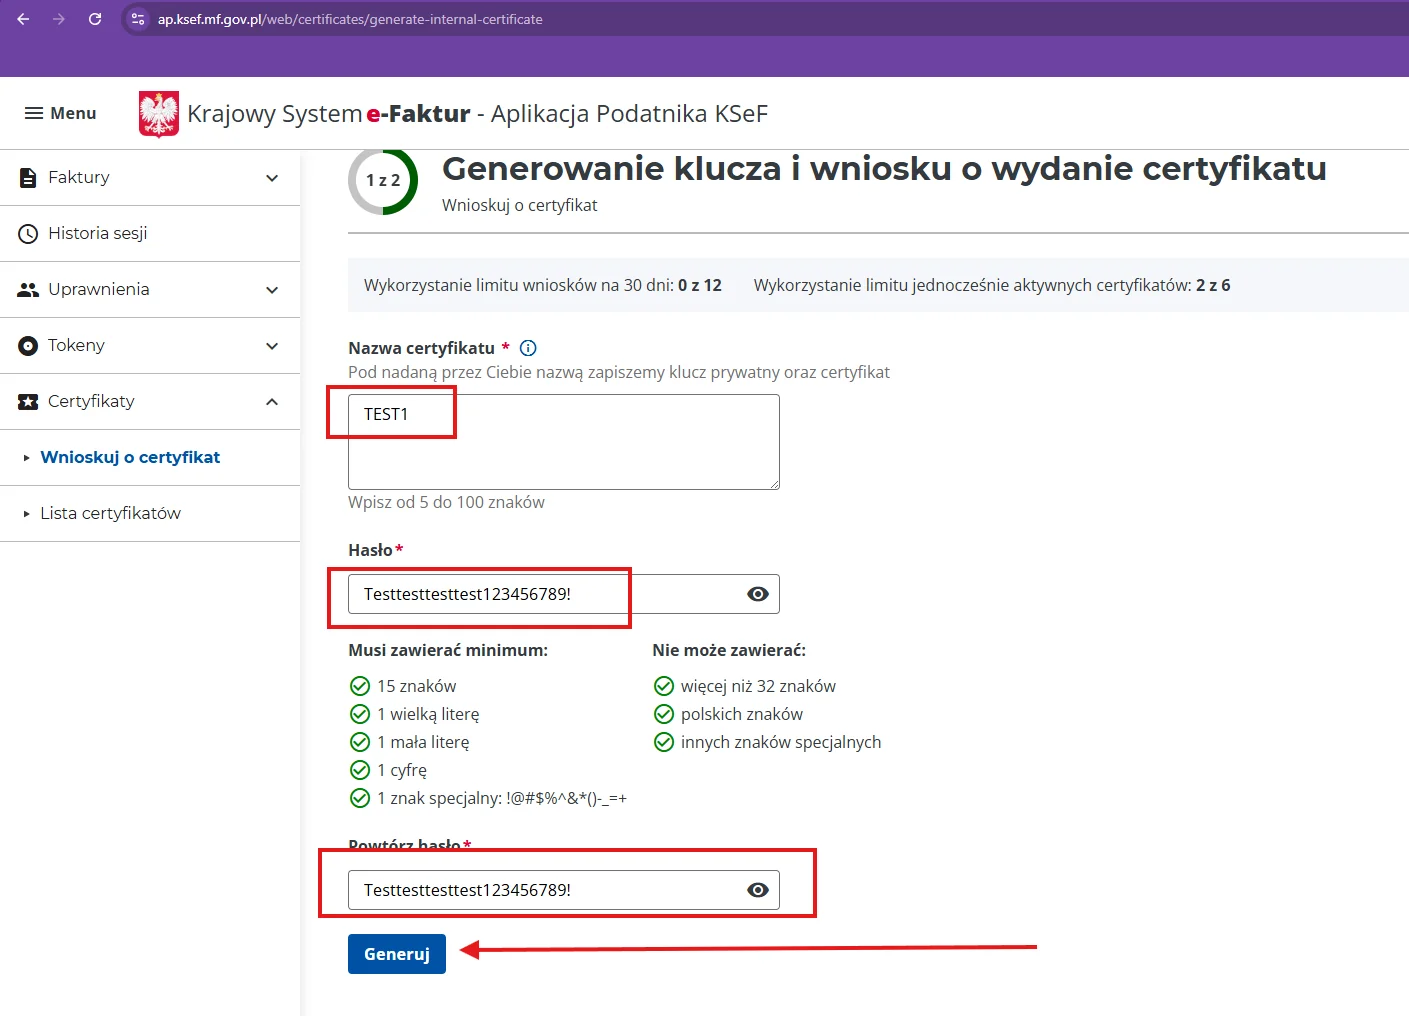
Generate the private key
Click „Generuj” (Generate).
KSeF creates a .key file and saves it to your computer.
Keep this file. The private key can't be downloaded again later.

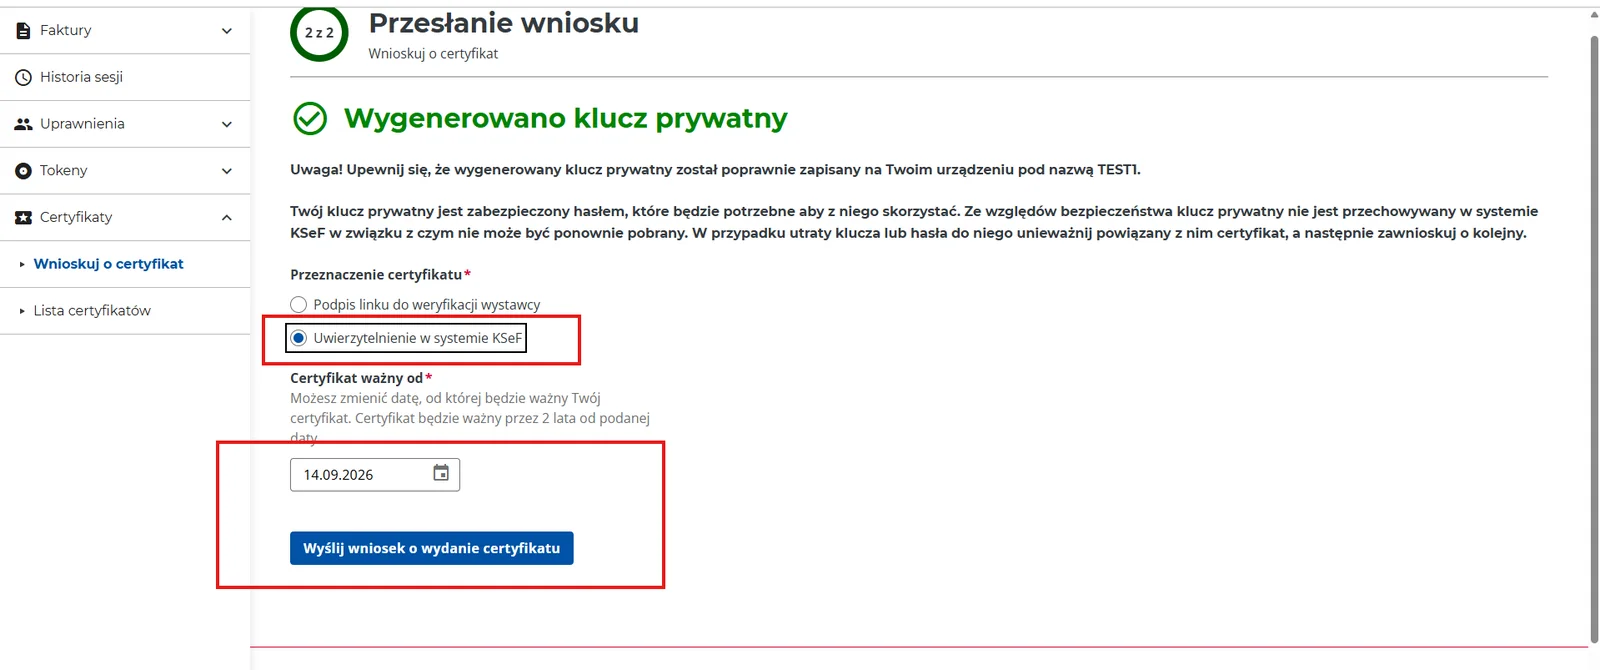
Select „Uwierzytelnienie w systemie KSeF”
Select this certificate type and submit the request.
This is the first certificate you need for the bFAST integration.
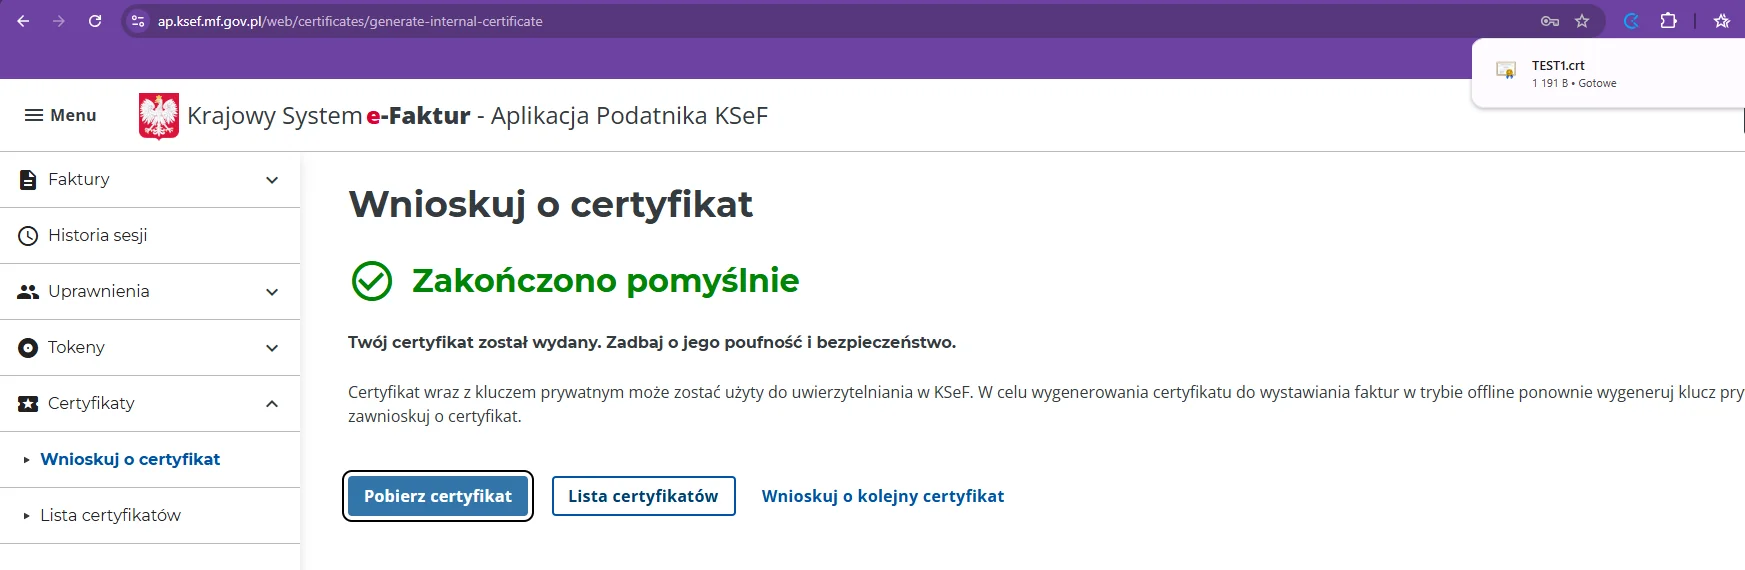
Download the certificate
Once the certificate has been issued, refresh the page and download the .crt file.
You now have your first set:
- ●the .key file
- ●the .crt file
Generate the second certificate
Repeat the same process, but this time select:
Generate a .key file again, submit the request, and download the .crt file.
When you're done, you should have two sets of files.
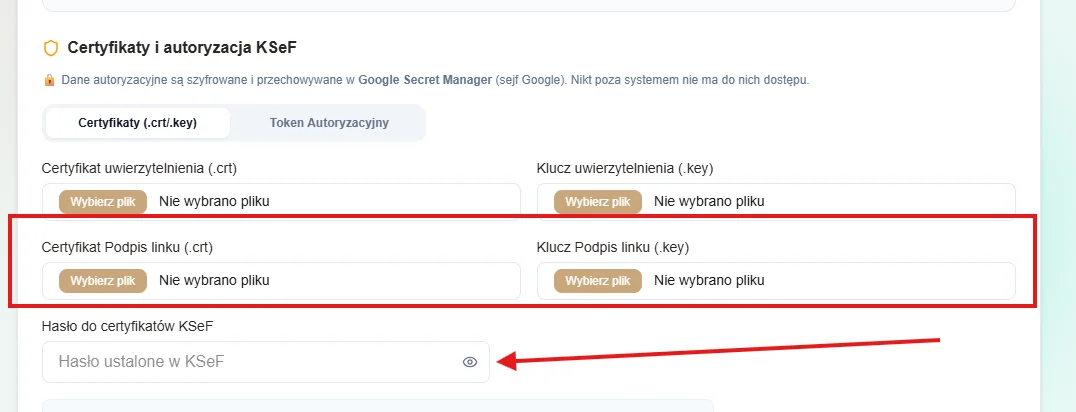
How to upload the certificates to bFAST
Log in to bFAST
Open the client panel and go to the section where KSeF certificates are added.
Add the authentication certificate
In the relevant fields, add:
- ●the .crt file of the authentication certificate
- ●the matching .key file
- ●the password you set when generating the certificate
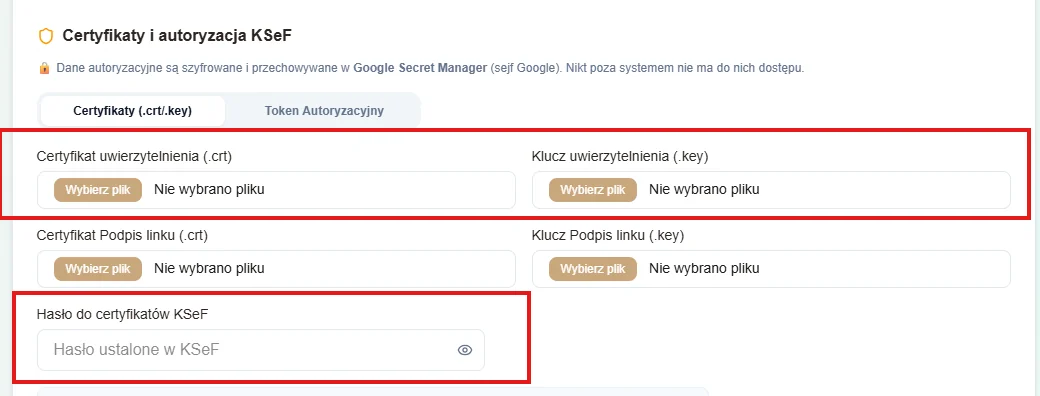
Add the link signing certificate
In the second set of fields, add:
- ●the .crt file of the link signing certificate
- ●the matching .key file
- ●the certificate password
Confirm
Check that both sets have been added to the correct fields, then confirm the configuration.
Once the certificates have been added successfully, bFAST can communicate with KSeF.
Tip: it's best to generate both certificates in KSeF first and only then switch to bFAST. That way, you can add all the files in a single setup session.
How to store your certificates securely
The .key file and the certificate password are especially important. Anyone who gets access to them may try to use them to authenticate with KSeF.
For that reason:
- ●don't send keys and passwords by regular email or messaging apps
- ●keep a copy in a secure place
- ●don't share the files with anyone who doesn't need them
- ●if you suspect your key or password has fallen into the wrong hands, revoke the certificate in KSeF and generate a new one
Once you add the certificates to bFAST, they are stored in encrypted form in Google Secret Manager.
Common problems
Missing permissions to manage certificates
Check your permissions in KSeF. If they were only just granted, log out and log back in.
Lost .key file
The private key can't be downloaded again. In that case, you need to generate a new certificate.
Mixed-up files
When you save the files, label them right away so you know which set is for authentication and which is for link signing.
Incorrect password
During import, enter exactly the same password you set when generating the certificate in KSeF.
Expired certificate
Check the certificate's expiration date and generate a new one well in advance.
Summary
To connect bFAST to KSeF, you need two certificates:
- ●the authentication certificate
- ●the certificate for signing the issuer verification link
For each one, you save the .key file and download the .crt file.
Then you add both sets in the bFAST panel, along with the matching passwords.
Once setup is complete, bFAST can handle communication with KSeF, including sending invoices and downloading documents.
Send invoices to KSeF with bFAST
Create a free bFAST account and use invoicing software integrated with KSeF.